
|
Home Methods Tools Workbench Emerging Links About Contact Galleries: Stone Wood Other History of sculpture    |
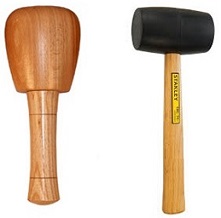
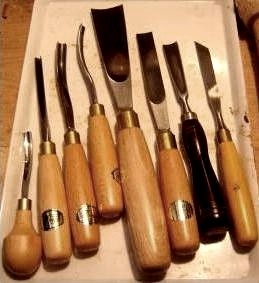
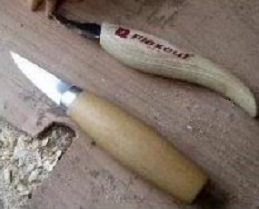
Wood Carving ToolsThe main tools used in wood carving are gouges, knives, rasps and rifflers.Wooden mallets are good for small carvings or detail work, but for more heavy-duty work, get a rubber mallet from a camping store. Also, some power tools are useful for speeding up the "roughing out" stage, especially chainsaws, angle grinders and drills. • Dont be tempted to buy budget price wood tools - cheap gouges and rifflers are okay for working on soapstone or plaster, but wood is much more demanding. You need the very best tools, and you need to keep them sharp. Gouges A "gouge" is a chisel but with a curved cutting edge. There are three variables:- The width of the cutting edge, the sweep is the curve on the cutting edge, from almost flat to U shaped (numbers 3-9) and the shaft can be Straight, Curved, Spoon, or Back-bent. No-one could own all the possible permutations, so start with an all-purpose selection: eg. Straight ½" no.2 Straight ¾" no.4 Straight 1½" no.5 Curved ½" no.8. Curved and spoon gouges are good for scooping out hollows, and straight gouges are best for use with a mallet. You might only use a back-bent gouge very occasionally, but when you do, you will make cuts that would be impossible with any other tool. Small palm-held gouges known as Blockcutters are very good for working in confined spaces. Knives My favourite carving knife is the Sloyd design, with a 2" blade. The curved blade is long and pointed enough to get into tight corners, and the shape of the handle lets you make a real fist round it so you put a lot of power into the cuts. Some chic Japanese knives look similar to the Sloyd, but not as chunky. One for the ladies perhaps. • Beware.... Tool suppliers often put "Chip Carving knives" in with other carving tools. These have flat blades and are only suitable for engraving, not carving. |
|
||
|
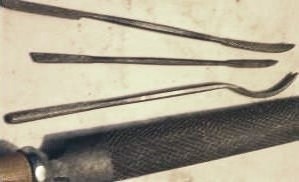
Rifflers and Rasps Rifflers are small curved files for smoothing out concave curved places. They come with various shaped ends such as the "Ski" and "Rat's Tail". Rasps are similar but bigger, for quick basic shaping of flat or convex surfaces. A well-made Italian rasp can take off a lot of wood quite quickly, so are useful where there's a danger that a gouge blow might split the grain. • Beware, you get what you pay for. You can buy a whole set of cheap rifflers for a quid at a DIY store, and they may be OK for plaster but are useless for wood. You need to to buy GOOD ones from a specialist shop like Tirantis or they just don't make any impression on wood. |
|
|||
|
Power tools
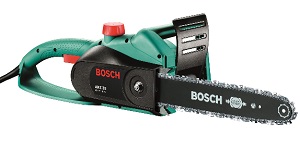
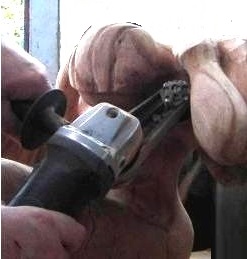
You can save a lot of time by attacking your log with a chainsaw. This is a noisy, oil splattered assualt, but with a bit of practice you can do your "roughing out" in hours rather than days. Petrol chainsaws are more powerful than electric ones but the exhaust fumes make them unsuitable for indoor use. Also, a shorter "bar" is better for sculpture. • Don't be blinded by technical specs; to use a chainsaw as a carving tool you have to be able to manoeuvre it, so weight and balance override any other consideration. Go to a DIY store, pick one up then flick it around like Zorro. Now, imagine that plugged in... An angle grinder can be used with a variety of cutting and sanding discs. They are useful for scooping out if you fit an "Arbortech wood cutter" mini blade. • Again, don't be blinded by technical specs, make sure you get a grinder that's light enough to hold in one hand. They are a lot more useful if you remove the safety guard - but don't quote me on that. A Dremel rotary tool is small enough to hold like a pen and get into the smallest recesses, especially with a diamond cutter. On small carvings it could be used instead of the more traditional Sloyd and Blockcutters. • I've had two and they both broke, so maybe they are not particularly robust. Finally, use the electric drill from your DIY box with a selection of drill bits, rasps and burrs, sanding discs and buffing pads. |
|
|||
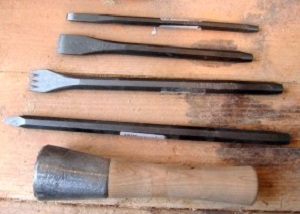
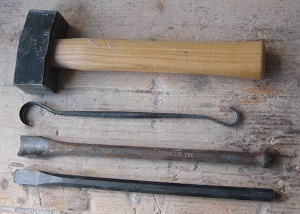
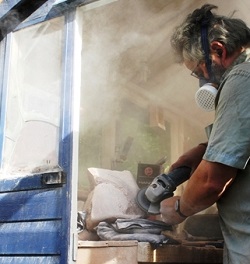
Stone Carving ToolsStone carving also uses chisels, gouges and rifflers but they are more robust, and nowhere near as sharp. As with wood, there are lots of sizes and weights, so ask a sculpture supply shop which tools would be appropriate for the stone you intend to work with.You can use a metal covered dummy mallet (round), or a solid lump hammer (square), weighing 1-2lbs. Soapstone is the softest stone, and can be carved with almost anything, a kitchen knife, a nail file etc. Alabaster, Wonderstone and Serpentine are a bit harder so you need some actual stonemason tools, but in light gauges. Marble is harder, and so requires heavier gauges. The ultimate is Granite, which really does need pneumatic power tools and a lot of determination. Generally you start off by removing a lot of stone with a lump hammer and a Point. Next, you pick up a Claw chisel for a bit more accuracy, then a Flat chisel to remove the furrows left by the claw. Finally, use a Riffler to remove the chisel marks. For concave areas you could use a curved-edge chisel, or a Gouge, followed by a hook-shaped Spatula rasp. All types of stone are finished off with wet-and-dry paper. Work your way through the grits eg. 120, 240, 400, 600, 800, 1200. At each stage you should change your water. Finally, apply stone polish to seal the surface. • Power tools can be used to speed things up, but watch out for the clouds of dust they throw up. An angle grinder with a stone cutting disc or a sanding disc can be used on most types of stone, but be sure to wear a decent FFP2 respirator, earplugs and sealed goggles. |
|
|||
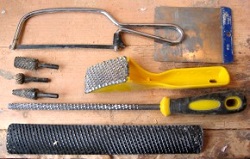
Plaster and Breeze BlocksYou can use chisels, gouges and rifflers, but dont use your good ones. This is where it's OK to buy a cheapie set from a DIY store, or, if any of your wood tools become unusable, put them in your plaster tool drawer. You can raid your DIY box for hand saws, craft knives, surforms, and drill bits, but be aware that once a tool has been used on plaster or concrete it will be fit for nothing else. It's the end of the line for tools.• You REALLY dont want to breathe in concrete dust, so keep that FFP2 respirator handy. |
|
|||
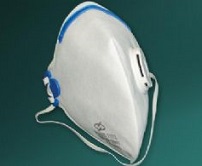
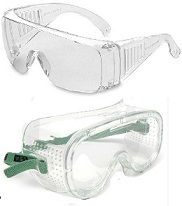
Protective ClothingBreathing - If you're carving stone you need a good respirator, one that meets "FFP2" standard. The cheapie disposables sold at DIY stores are WORSE than useless because they stop you being worried about dust, when in fact they do NOTHING to protect you against silica. Hearing - If you intend to use a chainsaw or an angle grinder you should get earplugs, or use an MP3 player with in-the-ear earbuds - Pink Floyd, Joni Mitchell, Miles Davis, but no ABBA. Sight - If you wear specs these should give adequate protection from chips, but if you don't, get some plastic goggles to protect your eyes from wood/stone chips.
Your left hand - It's ALWAYS your left hand that gets it, either a blade slipping or a mallet glancing off a chisel. Leather gardening gloves give protection against impacts during the roughing out stage, but they're not flexible enough for fine control of cutting tools. There are hi-tech gloves in workwear shops which give you a lot more finger control and also reduce the vibrations from the constant pounding which can lead to arthritis.
Your feet - I didnt think about my feet until one day I had a strange accident with a heavy block of wood. It broke my finger then crashed onto my foot, but by luck I was wearing work boots which had steel toe caps. Didn't feel a thing... |

|
|||
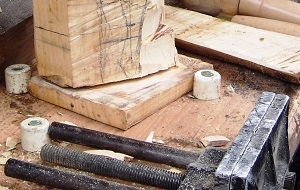
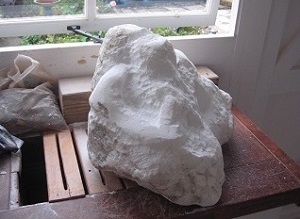
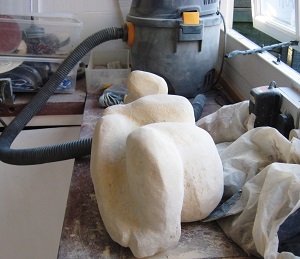
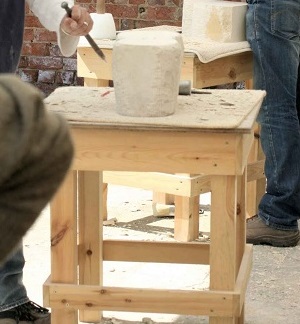
A Manageable WorkspaceSandbags - Sandbags allow you to easily rotate or invert the piece, as they mould themselves to any irregular shape. Sewing up the legs of old jeans and filling them with sand works well. Bench Dogs - Drill lots of holes through your bench top, big enough to take a coach bolt. The more you drill, the more versatile the bench dogs will be. You can buy metal dogs from DIY shops, or, make your own with rubber door-stops and coach bolts. G-clamps - Round logs can roll around a lot, even when you use sandbags or bench dogs. But, if you put a couple of clamps round the log they will dig into the bags and immobilise your piece. Workbench - If your studio's layout allows it you should construct a sturdy workbench attached to the wall, just under an opening window. An "L" shaped bench allows you to really spread out while keeping everything within reach. A vital factor for your main workspace is where the light falls - you don't want to work in your own shadow. Spotlights and anglepoise lamps are useful but you can't beat strong natural light. It's also vital to have good ventilation as stone dust can seriously damage your health. I put a fan behind me to create a through draught. Stone dust can pile up quickly, and the worst thing you can do is to brush it - this just kicks it up. In my main working area I made a workbench panel with removeable slotted pieces, so the dust can fall through into a tray of water on the shelf below. Gravity and water, the simplest way of avoiding dust piles. Shop vac - I have one up on the bench so that the hose reaches the main working area and the on/off switch is in easy reach. No matter how good the filter is there could still be some ultra-fine dust being blown out, so it's best to have the exhaust vent pointing straight out of the window. Banker - If you work outdoors or in a group workshop you could use a "banker" - this is a very study mini-bench, about 2 foot square. Because of their size you can drag them around to the sunniest spot in the garden. They're useful in a class situation because you can arrange them so that each sculptor has enough elbow room, and one person's hammering doesn't shake his neighbour's work. |
|
|||